

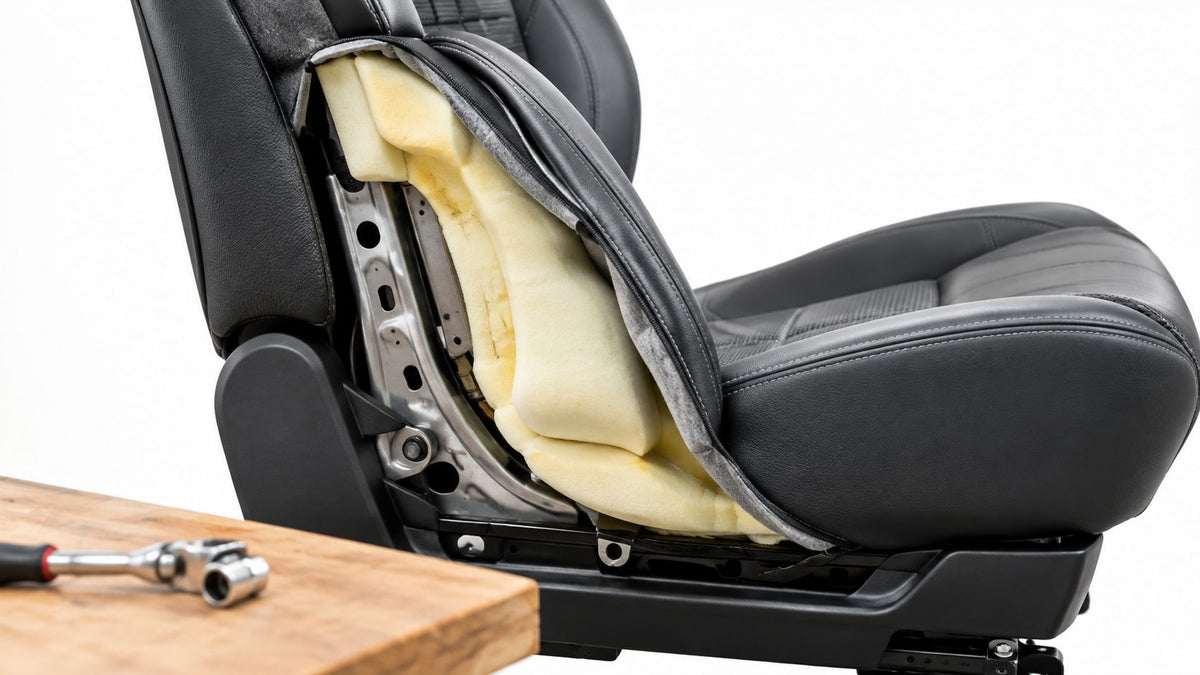
The popular advice is simple: car seat bolsters are just comfort padding. That advice can send a salvage rebuilder in the wrong direction. A seat may look acceptable from the door while its outer bolster is crushed, its seam has opened, or its side structure has shifted after a collision.
A bolster is the seat's lateral cradle. It helps keep the occupant positioned relative to the belt, side airbag, cushion, and door. Cosmetic damage matters, but changes to the foam shape, frame, mounting points, belt clearance, or airbag seam can matter far more.
By the end of this guide, you'll know how bolsters work, how they fail, which repairs are cosmetic, and when bolster work belongs inside a complete seat and restraint restoration. For a broader view of the parts involved, see this overview of automotive safety components.
Table of Contents
- Why Car Seat Bolsters Are More Than Comfort
- What a Car Seat Bolster Does
- Bolster Designs by Seat Type and Material
- How Bolsters Wear Out and Get Damaged
- Cosmetic Fix or Structural Repair
- Pairing Bolster Work With Full Seat and Restraint Restoration
- Bolsters, Child Seats, and Final Checks
Why Car Seat Bolsters Are More Than Comfort
A worn bolster fools people. From the door opening, the seat may just look old. Once the cover is off, the real story often shows up in the outer edge: foam crushed flat, a side wire out of place, a seam stretched tight, or a frame edge that no longer matches the other seat.
For a salvage rebuilder, that matters because the bolster does more than make the seat feel snug. It works like the sidewall of a cradle. It helps keep the body where the vehicle's restraint system expects it to be. If the shape changes, the occupant's relationship to the belt, cushion, side airbag, and door can change with it.
Core idea: A vehicle seat is part of the occupant-protection system, not merely a place to sit.
The Insurance Institute for Highway Safety's side-impact rating guidance evaluates how the seat, restraints, door, and head-protection system perform together, and it also looks at occupant and dummy movement during the test. That is the right frame for bolster work. If the bolster is misshaped or poorly repaired, the problem is not limited to appearance.
A healthy outer bolster supports the torso and pelvis from the side. In normal driving, that support cuts down on extra body motion in corners and sudden maneuvers. During a crash, it helps determine how consistently the body meets the seat belt, side airbag, and cushion. That is why bolster condition belongs in the same conversation as other automotive safety components, not just trim and upholstery.
The first salvage inspection
Start with the whole seat, not the cover alone.
- Look underneath the trim. Check foam shape, side frame pieces, springs, brackets, and attachment points.
- Follow the belt path. Make sure the bolster or replacement trim does not crowd the belt or change its route.
- Identify airbag seams. A seat-mounted side airbag needs its intended tear seam. Universal covers and altered stitching can interfere with deployment.
- Compare the opposite seat. The other front seat often gives you a practical reference for contour, seam location, height, and compression.
- Check the mounting geometry. If the seat sits crooked, binds on the track, or shows damaged mounting hardware, the repair goes beyond upholstery.
Scuffs, fading, and a small isolated split may stay cosmetic. Flattened foam, bent support parts, damaged seams near an airbag, or shifted mounting points should be treated as safety-relevant until the seat is inspected properly.
What a Car Seat Bolster Does
A bolster works like the raised side of the seat cushion and backrest. The center panels carry most of your weight. The bolsters limit how far your body can slide sideways, so your torso and pelvis stay closer to the position the seat, belt, and side airbag were designed around.
That job is easy to miss because a bolster also affects comfort. A soft, low bolster can feel roomy and easy to climb over. A taller, firmer one can feel more locked-in. For a rebuilder, the important question is not which shape feels sportier. It is whether the rebuilt seat still places the occupant where the restraint system expects that occupant to be.
A front seat usually has two bolster areas:
- Seat-back bolsters run up the sides of the backrest. They help steady the torso and reduce side-to-side movement through the ribs and shoulders.
- Seat-pan bolsters rise along the cushion edges. They help center the pelvis and thighs, which matters because belt fit starts lower on the body than many people realize.
Height, width, contour, and firmness work together. A narrow, firm seat-back bolster can resist body roll more strongly in a turn. A wider, softer cushion edge may make entry and exit easier and spread pressure over a larger area. Neither layout is automatically better. The right one is the one that preserves the intended seat geometry for that vehicle.
How the parts work together
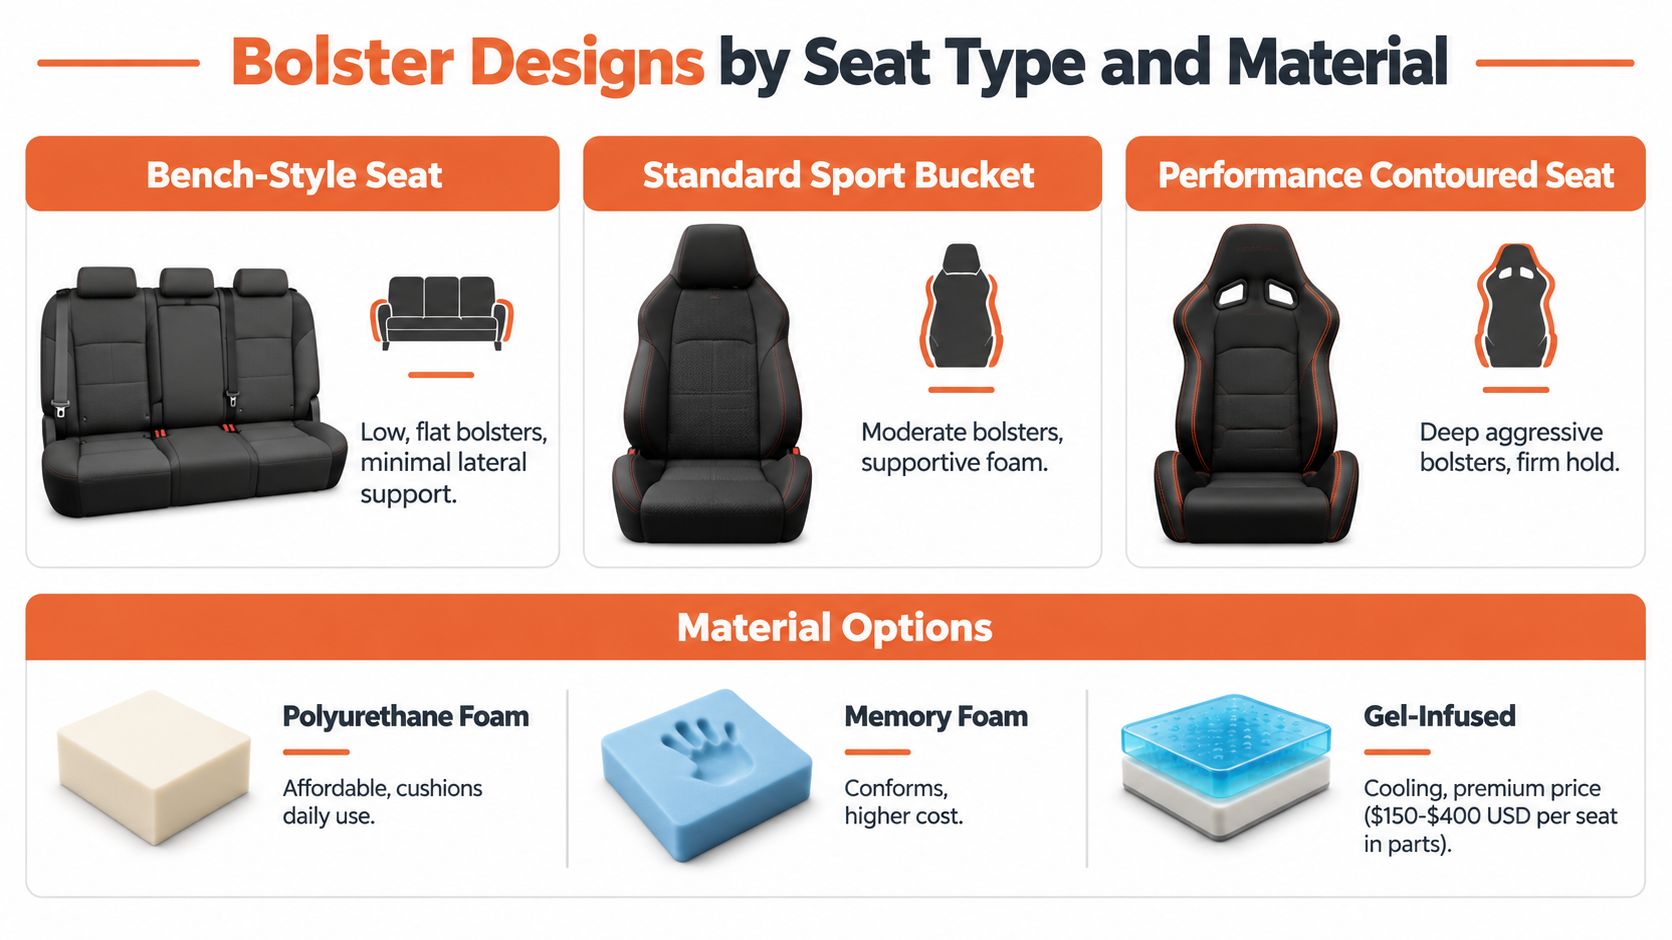
In a hard corner or sudden swerve, a flattened bolster lets the pelvis shift first, then the torso follows. That extra motion changes how the belt loads the body. In a side impact, the seat, belt, side airbag, door structure, and occupant have to respond together. The bolster is not the restraint. It is part of the positioning that lets the restraints do their job consistently.
That distinction matters in trim work. Extra padding under a new cover, foam that collapses too easily, or altered stitching near an airbag seam can change how the occupant meets the seat without looking obviously wrong from the door opening.
Geometry is the quiet failure
A replacement foam insert can look close and still be wrong. If it is wider and softer than the original, the driver may sit farther outboard, the pelvis may rotate, and the shoulder belt may lie across the torso differently. The seat may feel comfortable and look fresh while giving up the side support the original design relied on.
For salvage rebuilders, “it fits” is only the starting point. The finished seat needs the original profile, attachment points, belt access, airbag seam, and clearance around restraint hardware.
Bolster Designs by Seat Type and Material
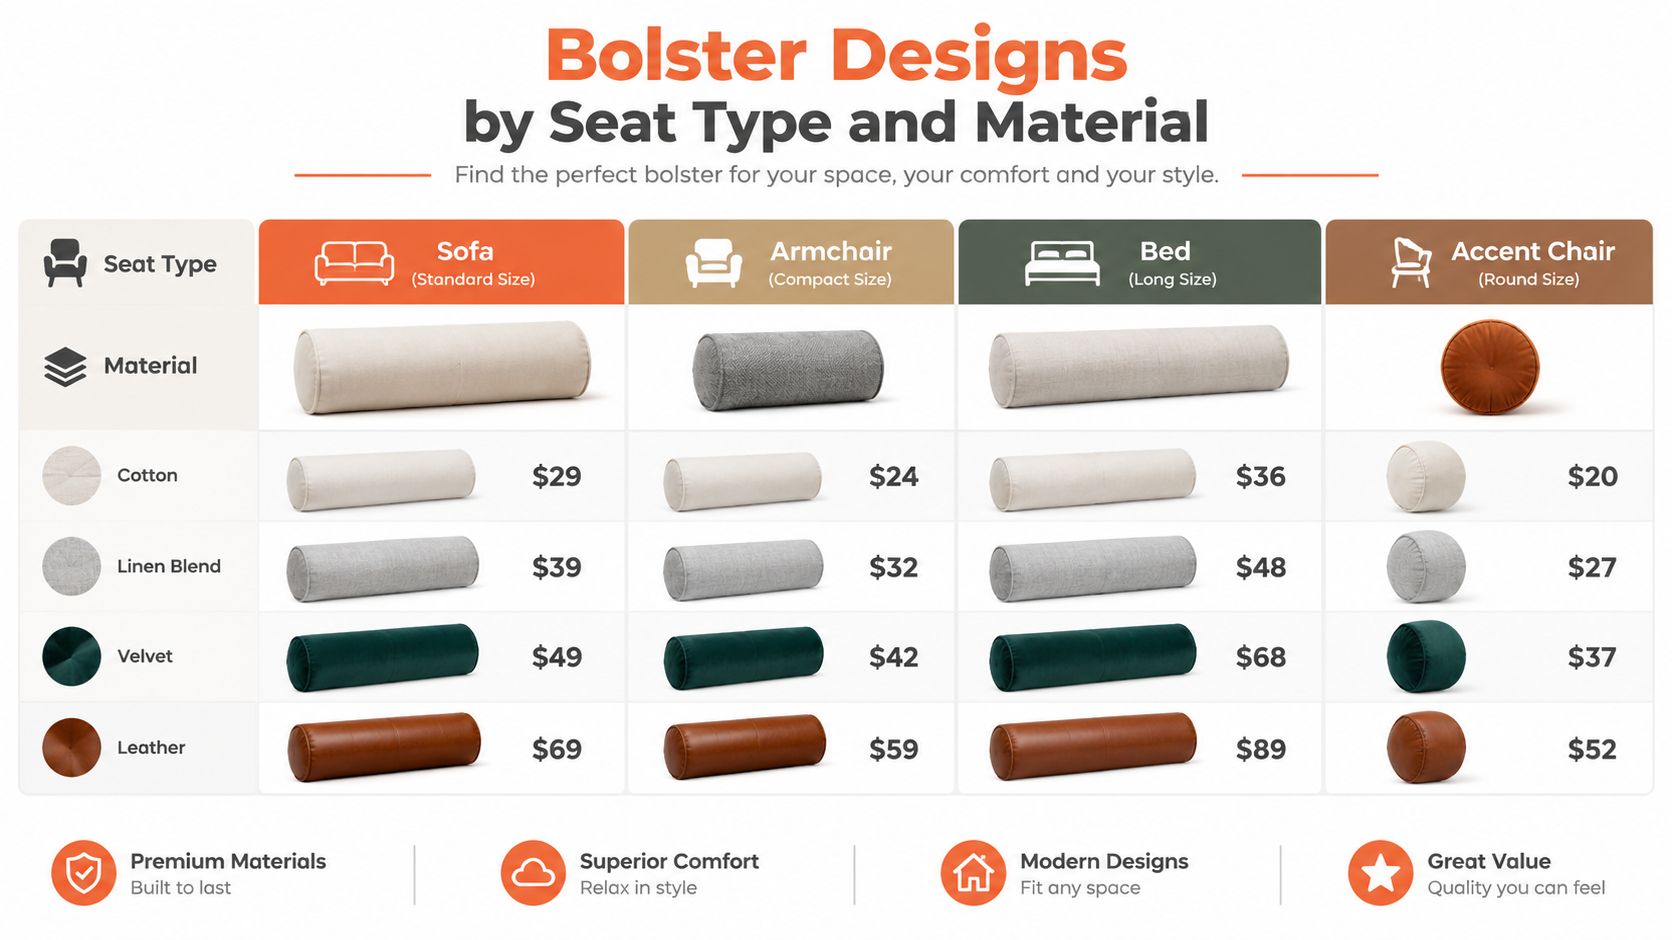
A bench-style seat, a standard sport bucket, and a performance-contoured seat solve the same basic problem with different compromises. The bench-style cushion keeps entry easy and spreads pressure across a broad surface. A sport bucket adds moderate side support without making everyday access difficult. A more contoured performance seat holds the torso and pelvis more firmly, but it can create pressure points and make entry harder.
Read the shape before judging the material
A narrow, firm bolster often gives a strong “locked in” sensation. A wide, softer bolster feels less restrictive and may distribute pressure more gently. The trade-off is lateral movement. If the cushion allows too much shifting, the belt has to manage more torso movement during a maneuver or crash.
A peer-reviewed real-driving study found that seat construction changes contact-pressure distribution and perceived discomfort. The firmest seat in that study produced higher contact-pressure and pressure-distribution values than softer or suspension-equipped seats, while the authors identified reinforced bolsters as a possible way to improve stability and reduce fatigue during prolonged driving. You can review the findings in the PLOS ONE study of seat construction and pressure distribution.
| Seat or material choice | Typical support character | What to inspect during rebuilding |
|---|---|---|
| Bench-style seat with cloth | Broad, forgiving contact | Flattening at the outer edge and weakened stitching |
| Standard sport bucket with polyurethane foam | Moderate containment and familiar daily comfort | Foam compression, edge collapse, and seam tension |
| Performance-contoured seat with reinforced foam | Strong lateral hold and concentrated pressure | Frame alignment, pressure points, and original contour |
| Leather or vinyl outer trim | Firm surface with clear wear patterns | Cracking, surface separation, and stressed attachment points |
| Cloth outer trim | Breathable feel and visible friction wear | Abrasion, pulled fibers, stains, and seam separation |
The cover material affects feel and durability, but it doesn't define the safety of the seat by itself. A high-quality leather cover cannot compensate for a bent side frame. A clean cloth cover cannot hide a bolster that no longer supports the body correctly.
For specialized replacement inserts, trim fixtures, or low-volume automotive components, a rebuilder may also encounter automotive additive manufacturing services. That kind of resource can be useful when a discontinued trim support or production aid needs a carefully developed replacement, but any part near a restraint attachment still requires engineering validation and must not be treated as an improvised substitute.
How Bolsters Wear Out and Get Damaged
The driver's outer bolster usually tells the story of daily use. Drivers slide across it during entry and exit, placing repeated friction and compression on the same narrow area. Over time, the foam loses height, the cover stretches, and the edge no longer feels like a cradle.
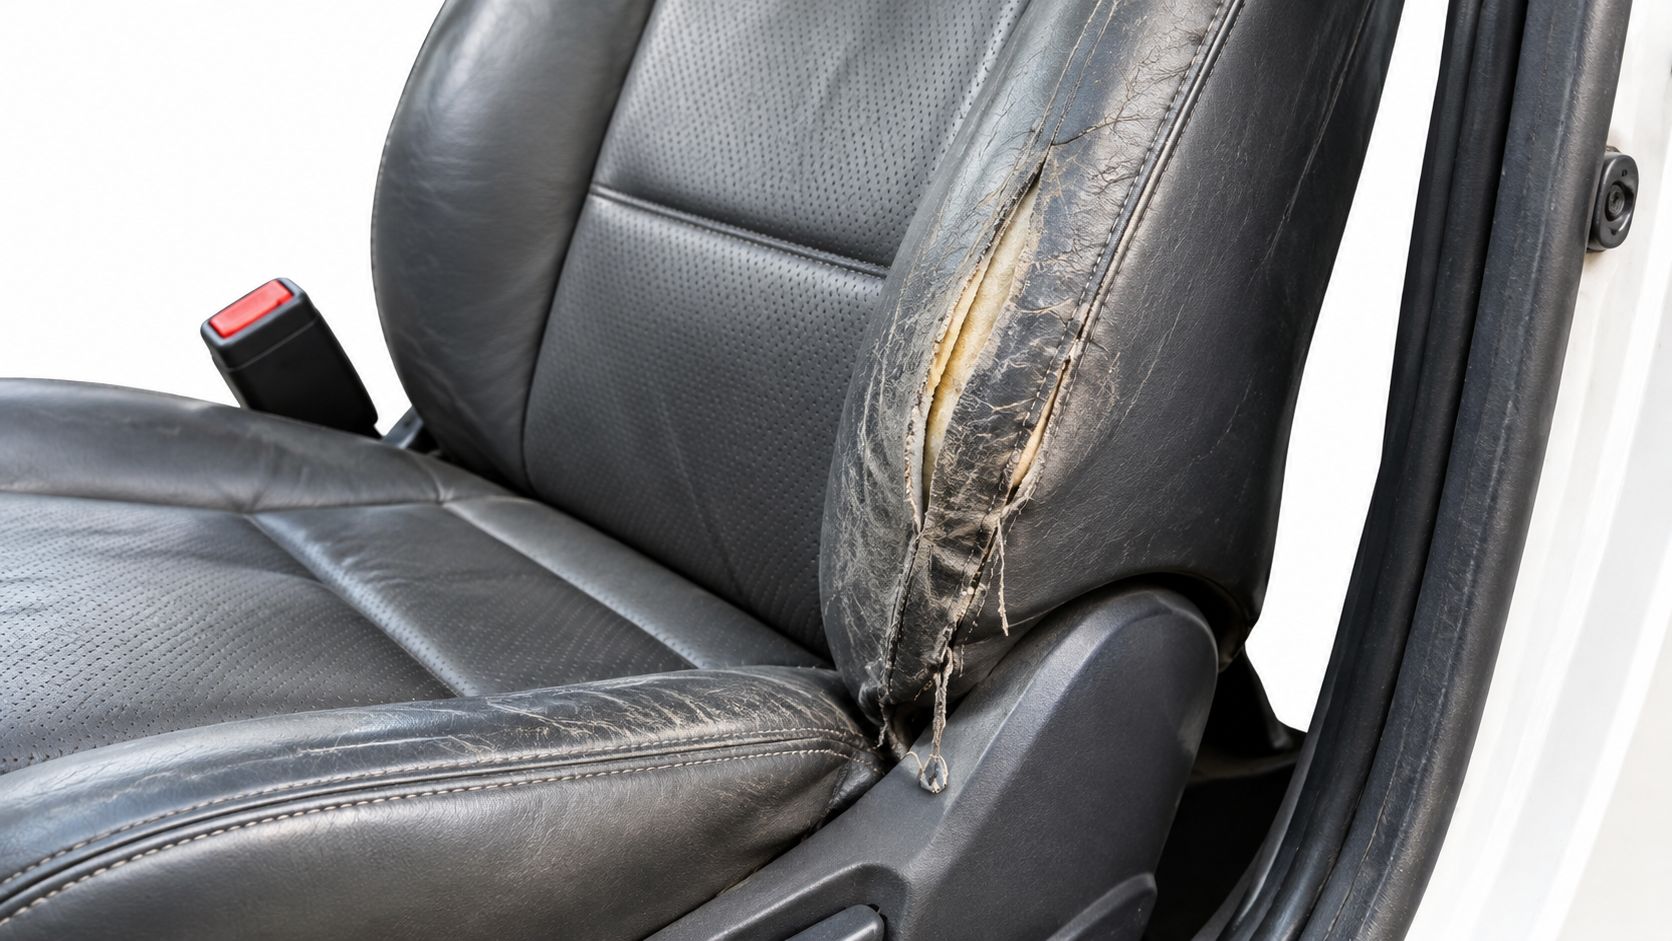
A surface crack in leather or vinyl may be cosmetic if the material underneath remains stable. A split seam is different. It can indicate that the cover is carrying tension from compressed foam, distorted framing, or repeated loading at the edge. Exposed foam can absorb moisture, crumble, and lose the shape that supports the occupant.
Match the visible symptom to the hidden cause
- Flattened outer foam: Often points to repeated entry and exit, but severe flattening can change the occupant's lateral position.
- Cracked or faded leather: May be surface deterioration, especially when the foam profile and stitching remain sound.
- Torn stitching: Inspect the seam allowance and the attachment beneath it. Restitching a seam under constant structural tension won't solve the cause.
- Crushed side bolster: Treat as collision-related until the frame, foam, and mounting area have been checked.
- Loose or distorted trim: Look for missing clips, stretched listings, damaged hog rings, or a cover that no longer matches the original contour.
- Uneven seat height: Compare the repaired seat with the opposite side and check for bent tracks, brackets, or a shifted cushion base.
A seat can look surprisingly normal after a side impact. The outer cover may hide a bent support, compressed foam, or weakened attachment. That's why a proper inspection includes the frame, foam, trim seams, and mounting points rather than stopping at the visible upholstery.
If the damage is limited to cleaning, staining, or surface treatment, guidance on car seat care by APEX NANO can help with the maintenance side. Care products won't restore crushed foam or correct a distorted frame, so separate appearance work from structural diagnosis.
A useful inspection sequence is:
- Remove or loosen the cover enough to see the foam profile and internal seams.
- Compare the damaged side with the matching bolster on the other seat.
- Check for cracks, bends, loose welds, broken clips, and displaced brackets.
- Refit the cover only after confirming the original shape and restraint clearances.
The following video can help orient a technician to common seat bolster construction and wear points, but it shouldn't replace the vehicle's service information or a collision inspection.
Cosmetic Fix or Structural Repair
The right repair depends on what failed beneath the surface. A dye or conditioner can improve appearance, but it can't rebuild a collapsed foam edge. A new cover can restore the original look, but only if the replacement preserves the correct shape, seams, attachment method, and airbag path.
Use three practical tiers.
Cosmetic refresh
This is appropriate when the foam, frame, seams, and mounting points remain sound. Cleaning, conditioning, color restoration, a small surface patch, or carefully repaired stitching may be enough for scuffs, fading, and isolated finish damage.
Cosmetic work should leave the seat profile unchanged. If the driver still sits lower, farther outward, or at a different angle after the work, the job wasn't merely cosmetic.
Reupholstery
Reupholstery replaces the cover and may include new foam while preserving the original seat architecture. The replacement should match the original bolster height, width, firmness, seam location, listing points, and side-airbag deployment arrangement.
Inexperience can create hidden problems here. A cover that looks excellent but pulls the bolster inward, rounds off the cushion edge, blocks belt access, or uses the wrong stitching near an airbag isn't an equivalent restoration.
Structural repair
Structural work addresses a bent frame, damaged recliner area, displaced mounting point, failed attachment, or foam geometry that no longer supports the intended seating position. It may require a qualified collision or seat specialist rather than a trim-only repairer.
The table below is a practical screening tool, not a substitute for the manufacturer's repair procedures.
| Damage Type | Right Repair | Safety Impact |
|---|---|---|
| Light scuff, fading, or surface discoloration | Clean, condition, recolor, or apply a surface repair | Usually cosmetic if the foam, seams, and shape are unchanged |
| Small isolated cover split with stable foam | Patch or replace the affected trim panel | Preserve original seam placement and airbag-related construction |
| Pulled seam with intact underlying structure | Re-stitch after checking tension and attachment points | Can become safety-relevant if the seam is part of an airbag deployment path |
| Flattened or crumbling bolster foam | Replace with equivalent foam and restore the original profile | Changes in height or firmness can affect posture and belt geometry |
| Crushed side structure or bent frame | Structural inspection and approved repair or replacement | Potentially safety-critical because load paths and seat position may change |
| Damaged mounting point or track | Repair or replace using equivalent hardware and geometry | Directly affects seat attachment and occupant positioning |
| Unknown collision damage | Full seat and restraint inspection before cosmetic work | Appearance cannot establish safe function |
The key warning is simple: a replacement cover can change designed occupant interaction. If it alters bolster shape, belt clearance, or an airbag deployment path, the restored seat may not behave like the original even when the upholstery looks factory fresh.
Federal requirements reinforce the distinction. Under NHTSA's description of FMVSS No. 210, lap-belt-only anchorages have historically been required to withstand 5,000 pounds of force, or 22,241 newtons, while combination lap-and-shoulder anchorages have been required to withstand 3,000 pounds, or 13,345 newtons. The prescribed force is reached within 30 seconds and held for 10 seconds, as described in the NHTSA and Federal Register material on seat-belt anchorage requirements. Those are anchorage test requirements, not a rating for a bolster, but they show why nearby seat structure and geometry deserve disciplined inspection.
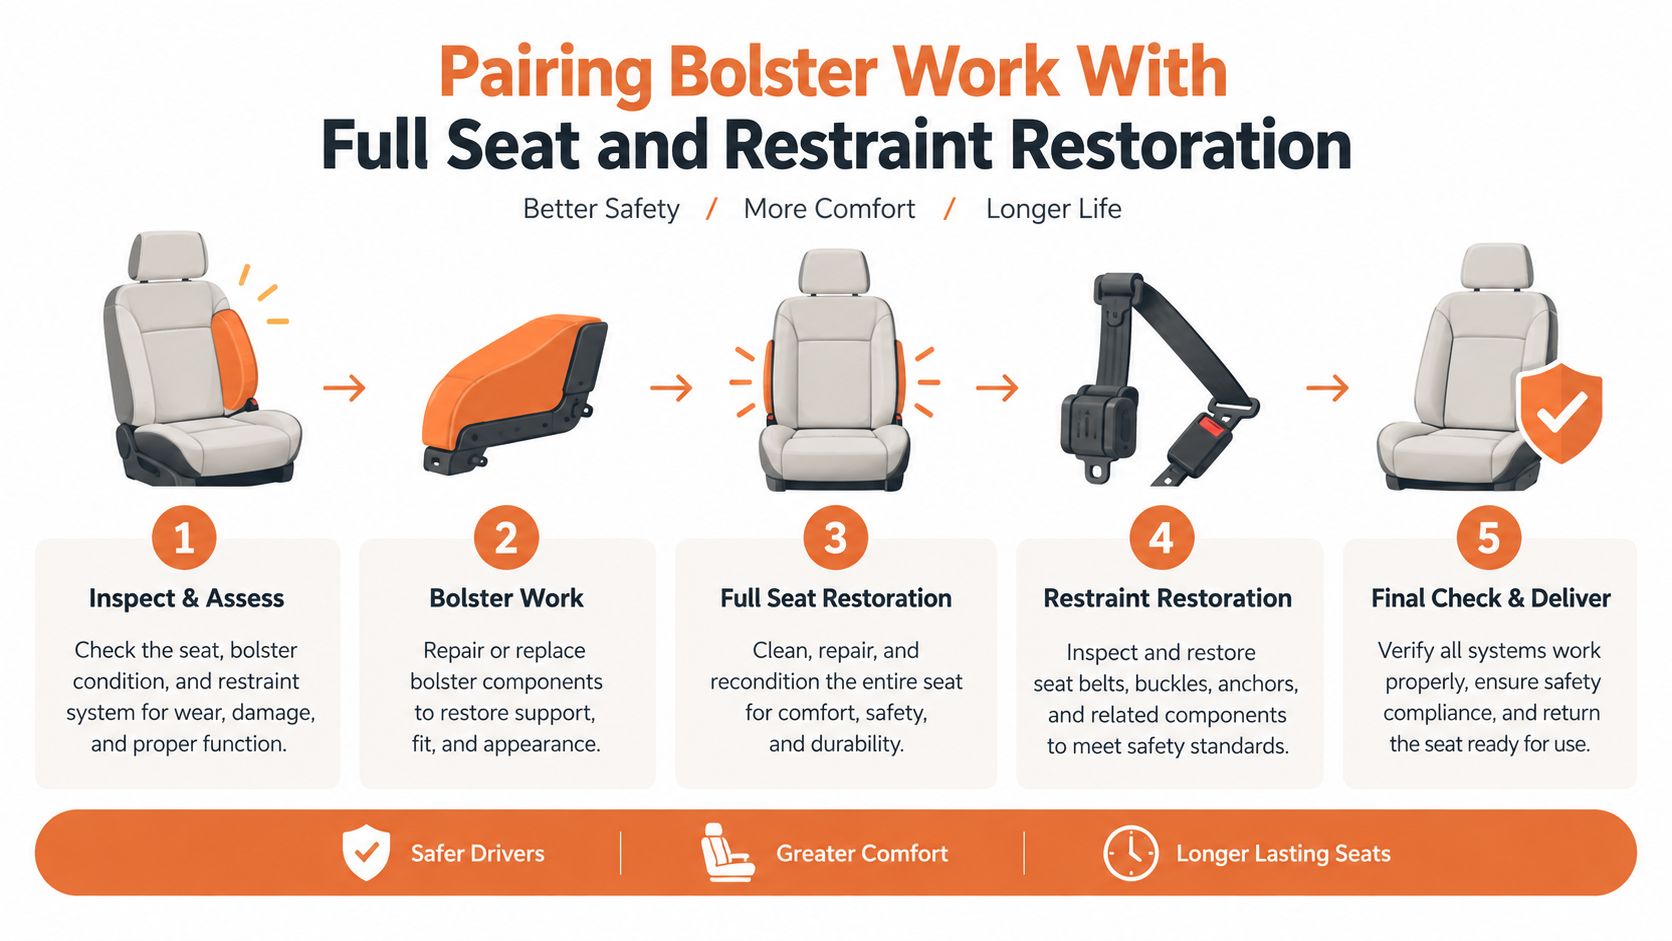
Pairing Bolster Work With Full Seat and Restraint Restoration
A salvage rebuild shouldn't treat the seat cover as an isolated interior part. If the vehicle experienced a collision, the seat, belt, pretensioner, airbag system, floor attachment, and occupant position may all belong to the same repair story.
Start with the seat out of the vehicle. Photograph the original condition before removing trim. Mark the locations of clips, listings, harnesses, airbag seams, and belt-routing features. Then inspect the side frame, recliner, cushion base, tracks, and mounting points before deciding whether the job is upholstery, structure, or both.
A sound restoration sequence
- Document the seat. Record damage, wiring, trim condition, and the relationship between the bolster and restraint components.
- Inspect the structure. Check the frame, foam, recliner, tracks, brackets, and mounting geometry.
- Confirm restraint clearance. Verify that belt routing, pretensioner access, side-airbag seams, and electrical connections remain unobstructed.
- Restore the seat profile. Repair or replace foam and trim without changing the original contour or attachment method.
- Test before installation. Confirm that the seat moves correctly, locks securely, and leaves the restraint system ready for proper diagnosis and reinstallation.
The NHTSA FMVSS 207 test procedure requires the seat, its attachments, and its installation to resist impact-related forces. The procedure also incorporates the additional anchorage forces specified under FMVSS 210, including simultaneous 3,000-pound forces applied to the lap and shoulder portions of the belt assembly in the specified configuration. That requirement doesn't mean a bolster carries the anchorage load. It does mean a repair near the seat side structure, recliner, or belt-anchor region should preserve the complete load path.
Keep restraint work on the same schedule
With the seat removed for reupholstery, it's practical to send related safety components for professional inspection or service rather than reinstalling a visually restored seat around an unresolved belt or SRS fault. The workflow can include checking locked pretensioners, damaged webbing, deployed restraint components, and crash-related SRS faults before final assembly.
A rebuilt vehicle also needs the correct surrounding parts. The guidance on collision repair parts is useful when a damaged auction car requires more than a cover and foam. The replacement must be equivalent in function, not just close in appearance.
For the rebuilder, the operational advantage is straightforward. One complete inspection reduces the chance of removing a freshly restored seat again because a belt, airbag connector, or mounting issue was missed. It also keeps the interior restoration aligned with the restraint system that gives the seat its safety role.
Bolsters, Child Seats, and Final Checks
Deep bolsters can create a child-seat problem that adult occupants may never notice. A rear-facing restraint may bridge between the raised side edges of the cushion instead of resting fully on the seat pan. The base can tilt, rotate, or sit unevenly even though the upholstery appears firmly compressed.
Research involving 59 child restraints and 61 late-model vehicles found that the restraint base fit snugly between seat-pan bolsters in only 63.3% of rear-facing and 62.2% of forward-facing combinations. Proper rear-facing base-angle compatibility occurred in 58.2% of combinations. These findings are reported in the PubMed study of child-restraint and vehicle-seat compatibility.
Booster fit brings another concern. A booster positions the lap belt on the pelvis and the shoulder belt across the chest. NHTSA-cited real-world evidence reports that boosters reduce injury risk for children ages 4–8 by 45% compared with seat belts alone, with especially large benefits in side impacts, as discussed in the NHTSA child-restraint safety material. A deep bolster can narrow the usable seating area, affect posture, or interfere with the belt path, so more side support isn't automatically better for a child.
Final verification routine
- Check the base. The child restraint should rest on the seat cushion, not balance on a raised bolster.
- Test movement. At the belt path, the installed restraint should move no more than one inch, following the guidance associated with the child-restraint research above.
- Inspect belt routing. Confirm that the vehicle belt or lower anchors follow both manuals and aren't forced around the bolster.
- Check the child's posture. Watch for slouching, leaning, shoulder-belt misplacement, or a booster that contacts the side bolster in a way that changes belt fit.
- Compare manuals. Use both the vehicle manual and the child-seat manual rather than judging installation by appearance.
- Finish the vehicle inspection. A used-car safety inspection should include the seat, belt, airbag, mounting, and child-restraint considerations together.
Comfort affects daily use, appearance affects resale, and structure affects safety. Before releasing a rebuilt vehicle, verify the bolster profile, the seat attachment, the restraint clearances, and any child-seat installation instead of relying on a clean cover as proof of a complete repair.
Seat Belt Repair can restore locked pretensioners, replace damaged seat-belt webbing, and reset SRS airbag control modules with OEM components through a national mail-in service. If a salvage rebuild includes damaged belts or crash-related SRS faults alongside bolster work, visit Seat Belt Repair to review the parts you can send for service and plan the restraint portion of the restoration.

Laisser un commentaire
Ce site est protégé par hCaptcha, et la Politique de confidentialité et les Conditions de service de hCaptcha s’appliquent.